Archives for category: Standing Postions

I have never met anyone who doesn’t enjoy this pose in some form. It is just fabulous for releasing tightness in the back and hamstrings. However, you have to be careful that the back doesn’t become dome-shaped. So use a chair in the beginning to learn (a) how to align the spine correctly and (b) how to rotate the pelvis forward around the tops of the thighs.In the full version of the pose, the head rests on the floor creating a gentle inversion for the body. This brings a fresh supply of blood to the head and heart, thus revitalising the entire system. As a forward bend, the pose cools and calms the mind. But don’t be tempted to go for gold just yet. Work with the chair first and get the alignment right, and in time this position will be one of the most rewarding in your repertoire!

How to practice Wide Leg Forward Bend (Part 1):

  • Stand arms-length away from the back of a chair. Make a very wide distance between the feet. Check that the feet are parallel.
  • Place your hands on your hips. Inhale, exhale, bend forward from the hips and hold the back of the chair. Take your head down in between the arms.
  • Each time you inhale, lengthen the entire front of the body. Also lift up the arches of the feet and the inner ankles. Each time you exhale, take the feet slightly further apart (but only if it is comfortable to do so) and lengthen the entire spine pushing back through the hips. The aim is to rotate the pelvis forward around the tops of the thighs until the sitting bones are in line with the ceiling. You can check this by reaching back and feeling for the bones. It could take a while before you get this movement. Most of us have very tight legs from so much sitting and this hinders the rotation of the pelvis. Take your time. When the sitting bones finally cooperate, you can do without the chair and move on to Part 2.
  • Stay for 6 breaths. To come up, each time you inhale, gradually shuffle the feet closer and closer together until you are back in Mountain Pose.

(Part 2)

  • As you exhale, take the feet slightly further apart (if possible) and rotating the pelvis further forward, place the hands on the floor underneath your shoulders (or on a yoga block or box if you can’t reach).  Do not rest the weight of the body on your hands but keep it on the pelvis and upper thighs.
  • Keep lifting the sitting bones and the tailbone up towards the ceiling. Relax the shoulders downwards. Look through the legs.
  • If you can, gently place your head on the floor.
  • Stay for 6 breaths. To come back up, each time you inhale, gradually shuffle the feet closer and closer together until you are back in Mountain Pose.

NEED HELP?  

If your back is dome-shaped, bend the knees slightly and work on rotating the sitting bones upwards from this stance instead.

~ If your legs are not strong or if they are very tight, sit astride a chair instead. Make sure both feet are parallel and then proceed as outlined above.

STOP!

~ Proceed carefully if you have any disc problems or are suffering from groin strain.

~ Do not bring the head lower than the level of the heart if you have glaucoma or detached retina.

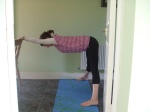
This pose is a sort of a cross between Triangle Pose and Warrior Pose I. Most beginners find it quite tough as it requires good balance, strength, stamina and flexibility. So, I don’t introduce it until the last couple of weeks of a beginners’s course to give people a chance to develop these qualities through easier poses. The version I am describing here is a modified version using the wall and a radiator (if possible) to help you learn the correct alignment of the pose i.e. how to keep the head and neck and spine in line while practicing the position.

Side Angle Pose is a fantastic position. It stretches the entire side of the body from the outer edge of the heel right up into the fingertips of the extended hand. It also opens the hips and improves digestion. Like all standing poses, it increases strength and vitality.

How to practice Side Angle Pose:

  • Stand in Mountain Pose with your back against a radiator. Inhale, exhale and take your legs apart. The distance between your legs should be more than the length of one of your legs.
  • Inhale, exhale, and turn your right foot 90 degrees out to the right and your left foot 45 degrees inwards. At the same time, extend your arms out to the side at shoulder height with your palms facing the floor.
  • Inhale, exhale and begin to bend your right knee until the back of the knee is in line with the right heel. Do not bend the knee further than this point.
  • Inhale, exhale, and with the back of your head in contact with the wall, lengthen the entire right side of the body and slide it down the wall to the right, until you can place your right hand on the radiator. If this is not possible, bend your elbow and rest your lower arm on your thigh.
  • Keeping your left arm in contact with the wall, stretch your left arm overhead so that the left side of the body forms one continuous  line from the outer edge of the left heel, right up the side of the body, into the left arm and all the way into the fingertips of the left hand. The palm faces outwards with the back of the hand resting against the wall. Resist the temptation to rest the weight of the body into the hand or arm. Instead, the pelvis and upper thighs should be doing most of the work to keep you supported. Look straight ahead.
  • As you inhale, stretch up into the fingertips. As you exhale, keep the tailbone moving down towards the left heel. The right knee tends to collapse inwards so keep resisting it outwards.
  • Hold for 6 breaths. Repeat on left side. Repeat x1.
  • Eventually, when you are confident in the position, you can come away from the wall. You can also try the full version of the pose by extending the side of the body fully and placing your hand near the inside of the foot of the bent leg. But DO learn this version from an experienced teacher.

NEED HELP? This is a demanding position so only practice it when your energy is high. For this reason, also, do not practice the pose more than twice a week.

STOP! ~ DO NOT take your arm over your head if you suffer from high blood pressure or heart problems. Place it on your hip instead.

~ Go easy if you suffer from lower back problems, prolapse of the uterus or knee problems. If your legs are flexible enough, you could practice the pose sitting astride a chair. The same applies to women in the later stages of pregnancy.

The spine can move in 4 ways:  it can bend forwards and backwards, rotate to the right and left and it can bend to the right and left. Yoga encourages us to move the spine in all of all these ways to ensure maximum flexibility. This is why it is important to practice a  wide range of yoga postures and not just to practice a few favorite poses, tempting as that is!

In Triangle Pose, the spine bends to the side, or bends laterally, if you want to be fancy about it. The body forms 5 triangles, hence the name. It is a wonderful position for the hips, in particular, which tend to degenerate prematurely, due to our mainly sedentary lifestyle. Triangle tones them up and makes them flexible again.  However, like Warrior Pose, it is quite a technical position and there’s lots of bits and bobs to learn about it. Otherwise, the spine goes out of alignment and you end up putting pressure on the discs. Plus, the neck does funny things in this pose. Therefore, I favour the straitjacket approach i.e. I tell students to practice the pose against a wall which restricts their movement and forces them into aligning their spines correctly. The ideal situation is if you can place your hand on a radiator. If not, a chair placed beside the wall will do. Learn the leg and hip movements first, before adding in the arm movements. Go slowly and take your time learning this one. Bad habits take only minutes to learn, but years to unlearn. Speaking from experience, yet again…

How to practice Triangle Pose:

  • Warm your hips beforehand. Stand with your feet slightly wider than hip-width apart. With the knees bent, swing from side to side: navel, chest, right shoulder…then navel, chest, left shoulder. Repeat several times.
  • Stand with your back against a radiator. If this is not possible, stand with your back against a wall with a chair placed on your right side about a foot away from you. The seat of the chair should be facing you.
  • Inhale, exhale, and take your feet apart about 3.5 – 4ft (1-1.2m).
  • Inhale, exhale, turn your right foot out to the right (90 degrees) and turn your left foot in slightly (about 45 degrees). At the same time, take your arms out to the sides to shoulder height.
  • Now, check (a) that your hips are facing forwards; (b) that your right heel is in line with the centre of your left foot; (c) that your arms are in line and that your hands are in contact with the wall; (d) that the back of your head is in contact with the wall.
  • Inhale, exhale, and move your left hip out to the left. (Think of the way the hip moves to the side in the nursery rhyme in I’m a Little Teapot or the hip movement of a petulant teenager as they put their hands on their hips and say “So!” )
  • Inhale, exhale, and start slowly sliding the back of the head, the right shoulder and the right arm  down the wall towards the right side until you can place your right hand on the radiator or on the seat of the chair.
  • Now, start sliding your left arm up the wall (with the palm of the hand facing outwards) until it is in line with the crown of the head. Rest the back of the hand on the wall.
  • Breathe in and out for 6 breaths. As you inhale, stretch up into the fingers of your left hand. As you exhale, keep moving your left hip back towards the wall and your tailbone down towards the left heel. However, do not over strain in the hip.
  • Look straight ahead. (Note: Many yoga books show photos of people looking up at the hand overhead but this is not advisable until you know the pose really well.)
  • To come out of the pose, inhale and slowly slide the left arm down the wall again and bring the right side of the body back upwards. Repeat on other side. Repeat x 2-3 times.
  • When you understand alignment in the position, you can come away from the wall and place your hand on your leg instead. You can then keep moving your hand further down your leg until you can place your hand on the floor, maybe… It depends on the flexibility of the hips. If you never get past the radiator stage, it doesn’t matter. It’s still Triangle Pose and your hips will love you anyway!

NEED HELP?  If you find the pose strenuous, wait for a day when your energy is higher. Triangle Pose improves your vitality, but first you need to have enough energy to practice it.

~If you are very stiff in the hips, try placing your hand on the back of a chair instead of the seat.

STOP! DO NOT take the arm overhead if you suffer from high blood pressure or heart problems. Place your hand on your hip instead.

~ Proceed very carefully, if you have hip problems or disc problems. If necessary, place your hand on your hip instead of taking it overhead. This will reduce the pressure of the bend.


Years ago one of my students complained that she didn’t like practicing the warrior poses because she didn’t want to develop an aggressive nature. Since then I always stress to people that the point of the warrior positions (there are 3 of them) isn’t to encourage you to go around beating up little old ladies but to help you conquer your inner brat. Because as well as developing physical strength and stamina, these positions help you to develop courage, confidence and determination: qualities that help you defeat your lower nature and become a more whole human being.

That said, although Warrior I is doable for total beginners of Yoga, it is nevertheless, a demanding posture which exercises all the muscles and joints of the body. So, only practice it when your energy levels are good. Also for this reason only do the pose twice a week at the most. In the beginning, only practice the leg movements adding in the arm movements when your stamina improves. This is quite a technical position and it will take some time to learn fully. Don’t get impatient with it but try and learn one new thing about the pose each time you practice it. You can do without the wall when you are confident in the position.

How to practice Warrior Pose I:

  • Stand in Mountain Pose with your back against a wall. Inhale, exhale and take your feet apart. The distance should be more than the length of one of your legs.
  • Inhale, exhale, and turn your right foot 90 degrees out to the right and the left foot slightly inwards (about 45 degrees). Check that the heels of both feet are in line.
  • Inhale, exhale, and take the arms out to the sides in line with the shoulders , palms facing the floor. Keep the right buttock, the upper back, the backs of the hands and the back of the head in contact with the wall.
  • Inhale, exhale, and slowly begin to bend the right knee. Continue gradually bending the knee over the course of a few breaths until the back of the knee is in line with the heel. Do not let the knee go further than this line.
  • Hold the pose for up to 6 breaths. As you inhale, lift your abdomen away from the tops of the thighs. As you exhale, keep the tailbone moving down towards the backs of the knees and the right knee moving towards the little toe of the right foot.
  • Also check that you feel a stretch (a nice one!) in 3 areas – across the chest, across the front of the pelvis and along the right inner thigh.
  • Keep the shoulders relaxed down but keep the sternum lifted upwards.
  • Look straight ahead, then look about 2 inches below nose-level.
  • Act like a warrior about to throw a spear. Think strong, focused, decisive.
  • Inhale, straighten the knee and come back to Mountain Pose again. Repeat on the other side. Repeat x2

NEED HELP? If you find the pose too strenuous, keep the distance between the feet narrow. Work on the leg movements only until you get stronger.

STOP! DO NOT take your arms to shoulder height if you suffer from high blood pressure or heart problems. Place your hands on your hips instead.

~Be very careful if you have knee problems. If possible, have someone support the bent knee as you practice the pose.

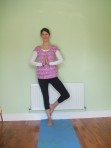
Tree Pose is my all-time favorite yoga pose. You just can’t beat it for grace, elegance, poise, harmony, calm – I think you get the idea. Yogis can be seen meditating in Tree Pose along the banks of the Ganges, the sacred river of India. In the film Australia, the Aborigine actor David Gulpilil  can be seen doing this pose with spears in his hand. He looks so much more relaxed than if he was standing on his two feet – relaxed, yet intensely alert. Alertness or attention is the key to all balancing positions  and is the reason they can be difficult for the beginner. Because standing on one leg demands a lot of concentration and usually one side will pose more of a challenge than the other. The trick is to establish what it feels like to be completely rooted and centered over your two feet and to transfer that feeling into the side you are going to balance on. Once you achieve that, it’s all about practice, practice, practice – until you can stand in the position for as long as you want.

  • To help you understand what rootedness feels like, practice swaying from side to side shifting the weight of the body from foot to the other. What you’re looking for is to feel that the weight of the body is evenly distributed over both feet. Gradually, slow the swaying down as you feel more centered. Eventually, allow yourself to come to a standstill and relish the sensation of being completely centered. This is the feeling of centerdness you want to shift to the side of the body in order to be able to balance successfully on one foot.

Tree pose is one of the most rewarding poses because it develops so many mental qualities like concentration, clarity and memory. It also improves balance, co-ordination and posture and strengthens the ankles, legs, spine, chest and arms. Plus, it is one of those mysterious postures that relaxes and energizes you at the same time.

How to practice Tree Pose:

  • Practice swaying from side to side as outlined above.
  • Stand in Mountain Pose with your right side facing a wall. If you start to wobble during the pose, place your right hand or even a finger on the wall to help steady yourself.
  • Imagine a line running down through the centre of your body dividing it into two equal halves. The middle point on this line is located in the abdomen, two inches below the navel and two inches into the body – this is your body’s centre of gravity. In order to balance on your right leg, this imaginary line has to move over to the left side of the body so that your centre of gravity has now shifted to your left hip. To do this, slide the the pubic bone over to the left until you feel centered in the left hip-bone. Keep the left leg firm.
  • Now try moving the foot in stages. The idea is that wherever you feel most steady, you leave your foot in this position until your balance improves in time. Bend the right knee and push the right big toe into the floor… If you can do this without losing your balance, place the big toe on top of the left foot… If this is okay, move on to placing the whole foot just above the ankle… Next try higher up the calf, and finally, if possible, place the foot on top of the inner thigh itself with the toes pointing down towards the floor. Your foot make get stuck in the material of your trousers. If so, push some of the material downwards out of your way… The final position is to place the foot in cross-leg position as shown in the photo above but this may take some time. In my case it took years…
  • To help keep you balanced, in your mind’s eye, picture the outer edge of your left foot and focus on that.
  • When you can stand steadily on one foot, move on to the placement of the hands. Inhale, and extend the arms out to the sides. Exhale, and place the hands into prayer position (Namaste) in front of the abdomen. In time, you can take the arms over the head either placing the palms together or holding them parallel.
  • As you inhale, lift hips, waist, ribs and chest upwards and stretch into the finger tips if the arms are raised over head.
  • Exhaling, move the right knee and thigh slightly down and back towards the body. This helps keep the hips as level as possible as the right hip automatically rises up when you place the right foot on the left leg. Also relax the shoulders and the sides of the neck downwards.
  • Keep the left leg steady and firm at all times.
  • Hold for 6 breaths. Inhaling, release your foot back down on to the floor again and repeat on the other side. Repeat on both sides x2 or x3 times.

NEED  HELP?

~ Balance can be one of the most difficult things to master. So, try practicing Tree Pose in your everyday life, for example when standing in a queue. Shift your pelvis over to the side and place one foot on the opposite one. Swap and do the other side. It gives you something to do and no one will even notice.

~ Practice Tree Pose in front of a mirror. It helps you balance for longer.

STOP!

DO NOT raise  your arms over your head if you suffer from high blood pressure or heart problems. Hold them in prayer position in front of the abdomen instead.

Half-Dog Pose is great for releasing the shoulders, back and hamstrings, and for lengthening the spine.

How to practice Half-Dog Pose:

  • Place a chair against a wall with its back facing you.
  • Stand in Mountain Pose and then bending from the hips, place your hands on the back of the chair shoulder-width apart. Raise your wrists so that they are higher than your knuckles.
  • Slowly, walk away from the chair until your feet are directly below the hips.
  • Lower your head and squeeze it between your arms so that your head, neck and spine are in line.
  • Your back should now resemble a table-top with the the trunk forming a right angle with the legs.However, there should be a slight indentation in the lower spine of about 1-2 inches.
  • Dig the heels into the floor. Soften the backs of the knees and inhaling, lift the area around the collar bones. Exhaling, take the chest back and push through the hips so that you lengthen the spine. The idea is tilt the sitting bones upwards so that they are in line with the ceiling.
  • Practice for 6 breaths. Inhale, and slowly come back up to Mountain Pose. (x3)

Need Help? ~ If your back is dome-shaped, it means the pelvis is rotated too far backward. Bend your knees slightly and keep working on rotating the sitting bones upwards.

~ If your spine sags in the lumber (lower back), the pelvis is rotated too far forwards. Keep pushing back through the hips while moving the navel area up towards the lower ribs.

~ If your legs are stiff or if they are not strong enough to practice the pose, you can do the position using 2 chairs. Sit on the edge of one chair which should face the back of the other chair. Make sure the second chair is far enough away so that you have to stretch out your arms fully to reach it. Place your hands on the back of the other chair in front of you with the wrists raised higher than the knuckles. Bring your head down in between your arms and practice the pose as above. In this way you will still get a nice stretch in your spine.

STOP! Proceed very carefully, if you encounter any of the above difficulties. You don’t want to put any pressure on the inter-vertebral discs.If in doubt, ask a yoga teacher to advise you.

Twisting has the same effect on the body as wringing water out of a cloth. It releases deeply held tension from the spine and the organs that surround it. When you twist, it can help to think of the spine as a spiral staircase: just as you have to walk up a step or two on a spiral staircase before you can turn, when twisting your spine you have to lengthen it upwards before you can rotate it. It is crucial to work with the breath to avoid injury. So, inhale before you lengthen the spine, and exhale before you rotate it.

And twist from the base of the spine always. Feel around for the knobbly bits near the end of the spine where the pelvis joins the spinal column. These joints are called the sacro-iliac joints. Move from here only as you rotate the spine around.

To practice Standing Spinal Twist:

  • Place a chair with its back against a wall.
  • Stand in Mountain Pose with your right shoulder in contact with the wall. Place your right foot on the seat of the chair.
  • Keeping your left leg firm on the floor, think of your spine as a spinal staircase. Direct the tailbone down towards the back of the knees, inhale and allow the spine to lengthen up towards the ceiling. Exhale, and twist slowly, moving no more than an inch to the right,  rotating from the base of your spine.
  • Keeping the legs facing straight ahead, continue for at least 6 breaths, inhaling, before lengthening the spine and exhaling before rotating it. Keep the head, neck and spine in line. The neck will want to race ahead and do its own thing.
  • When you have completely turned  the spine to the right, place both hands on the wall. Inhale, exhale. Inhale, and slowly return to Mountain Pose.
  • Stand with your left foot on the other side of the chair and repeat on that side.
  • Afterwards, practice Hangover Pose.

NEED HELP?

  • If your legs are not strong, or if you have disc problems, sit sideways on the chair.
  • Perform the pose in the same way as above, placing your hands on the back of the chair instead.
  • Afterwards, remain sitting on the chair and face forwards. Take your feet slightly wider than hip-width apart. Fold your arms, place them on your knees  and rest your head on top of your folded arms for a few moments. If your neck is stiff, place a folded blanket on your knees and rest your head and arms on that instead.

STOP! DO NOT practice this pose in late pregnancy.

Years ago while in holiday in Egypt, my husband and I took a trip down the Nile in a felucca. The boatman couldn’t have been a day under 70 and yet he was able to steer the boat from a squatting position for over an hour. Most people in developing countries can’t afford the luxury of furniture and as squatting is the most natural way for us to sit, that is how they cook, clean, eat and chat and go to the toilet. In this way their spines and hips stay mobile to a ripe old age. If you watch little children anywhere, they will squat down effortlessly onto the floor to play or pick up something. It is only when they begin to sit on chairs that they gradually lose this natural ability and connection with their bodies.

However, the body loves to squat as it allows the hips to open beautifully and the spine to lengthen upwards. For me it is one of the most important yoga positions. One of my main recommendations to students is to buy a little dustpan and brush and squat down once every day and sweep the kitchen floor clean. You will have great hips, great legs. a strong spine and improved digestion and elimination. And of course, a lovely clean kitchen floor!

Squatting is especially important during pregnancy as it helps open out the pelvic area in preparation for labour. You should have an easier birth if you practice the pose regularly.If you are not used to squatting, however, proceed very carefully, and use a wall for support. (See NEED HELP? below).

To practice Squatting Pose:

  • Stand in Mountain Pose with your arms stretched out in front of you, palms facing each other.
  • Inhale, exhale and pressing into the heels, bend your knees and slowly begin to go down into a squat. Keep your head, neck and spine in line.
  • The idea is to go all the way down with the heels pressed into the floor. But go up onto your toes if you need to. Don’t care about being a WUS! The body has to be eased gently into these things if it has been neglected for a long time. You could place a cushion under your heels if you like.
  • Only squat down as far as you are comfortable with. Listen to your knees, hips and back. If you can get down to the floor, great. Wrap your arms around your knees as if you were hugging yourself. Look at the floor. (In the advanced form of the pose, the arms are brought around the fronts of the calves and clasped behind the back. Hence the name Garland Pose or Malasana. Mala = garland.)
  • Hold the position for up to 6 breaths. Remember to keep breathing.
  • To come out of the pose, stretch your arms out in front again, inhale, and slowly come back up to Mountain Pose.

NEED HELP? 

~ If you find the position challenging, stand against a wall. Make sure the back of the head, the shoulder blades, the buttocks and the heels are all in contact with the wall. With the arms outstretched, inhale, exhale and slide down the wall into the position. Come up onto the toes when you need to. Again use your outstretched arms to support you as you come back up.

~ If your legs are not very strong, place a chair on either side of you for support. You could also hold on to the pole of a brush or broom. Alternatively, place your hands on top of a kitchen counter.

~ If your knees collapse in towards each other, place a yoga block or a hardback book in between them.

STOP! If you have serious knee problems or have had knee surgery ask your doctor’s advice before attempting squats.

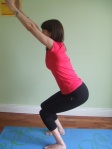
Utkata means powerful or fierce. Like many standing positions it is about building up stamina and strength in the body and in the mind. It is quite a demanding pose but is excellent for strengthening the muscles of the legs, back, arms and abdomen. It also strengthens the ankles and opens the chest.

To practice Powerful Pose:

  • Stand in Mountain Pose. Inhaling, raise your arms above your head with the palms facing each other.
  • Exhaling, press into your heels, bend your knees and take your buttocks down towards the floor as you were going to sit on a low chair or stool. The idea is to keep moving the thighs downwards until they are parallel to the floor. If this is too tough on the thigh muscles in the beginning, only go down as far as you are comfortable with.
  • Hold the pose, if possible for 3 breaths. As you inhale, lift the lower abdomen away from the tops of the thighs and stretch the palms of the hands upwards. As you exhale, direct the tailbone down towards the backs of the knees.
  • Inhale, and slowly come back up to Mountain Pose.
  • Repeat x 3
  • Rest afterwards in Hangover Pose (Uttanasana) for 30 seconds.

NEED HELP? If you need support while practicing the pose, hold the pole of a brush, broom or mop. Alternatively, place your hands on a kitchen counter. But keep the arms, shoulders and the sides of the neck relaxed.

STOP! Do not take the arms over the head if you suffer from high blood pressure or heart problems. Place your hands on your hips and just do the leg movements instead.

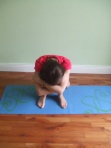
Despite its name, this pose doesn’t unfortunately cure hangovers. I call it Hangover Pose because in this position the trunk literally ‘hangs over’ the legs. In Sanskrit which is the ancient language in which yoga was written, it is called Uttanasana which means intense stretch. And intense it is.The body is stretched from the backs of the heels, up along the backs of the legs and continues along the entire length of the spine up to where the neck enters the head. It is excellent for releasing stiffness in the spine and can also be used as a resting position for the back after practicing other more demanding standing poses. You can also practice it from sitting. A good idea in the morning after you wake up, is to sit on the edge of the bed and do your hangover pose to relieve any stiffness in the back that the body has picked up over the night. This position also allows a gentle flow of blood and oxygen to reach the brain which has a revitalizing effect on the body.

To practice Hangover Pose:

  • Stand in Mountain Pose. Hold the elbows, right elbow with left hand and left elbow with right hand.
  • Bending from the hips, push your buttocks back towards the wall behind you.
  •  Inhale, exhale, and allow the trunk to drop down towards the floor so that it hangs over the legs.
  • Look at your knees (I know, thrilling!).
  • Gently nod your head a few times as if you were saying “yes” and shake it from side to side as if you were saying “no”. This will help release the neck.
  • Allow the elbows to gently sway from side to side. The idea is to keep the upper body feeling light and mobile and the lower body feeling strong and stable.
  • Breathe in and out 6 times.
  • Inhale, and slowly, slowly begin to uncurl the spine upwards again.
STOP! DO NOT attempt this pose if you suffer from High Blood Pressure, heart problems or have a herniated disc. You can try Half-Dog Pose instead which I will cover at a later date.